前言
本文旨在介绍 tomcat9 web 应用服务器的 server.xml 的常用配置,比如开启静态文件 gzip 压缩、配置 TLS 证书、跨域、网站更换域名需要做的工作等等。
修改配置前请备份文件:cp server.xml server.xml_bak
请勿在生产环境验证,请先在本地或者测试环境验证!
以下配置本人都亲自验证过,如果不生效请检查版本是否是 tomcat9。
一、gzip 压缩
<Connector port="80" protocol="HTTP/1.1"
               connectionTimeout="20000"
               compression="on"
               compressionMinSize="2048"
               noCompressionUserAgents="gozilla, traviata"
               useSendfile="false"
               compressibleMimeType="text/html,text/xml,text/plain,text/css,text/javascript,
               text/json,application/x-javascript,application/javascript,application/json,
               image/jpg,image/png,image/x-icon,image/jpeg"
               redirectPort="8443" />
参数解析:
compressionMinSize:启用压缩的大小,默认 2k
useSendfile="false":默认 true,即大于 48k 使用 sendfile 传输,不压缩。改为 false 则正常使用压缩。默认 true 允许操作系统内核直接在文件描述符之间传输数据,无须复制数据到用户空间,可以降低 CPU 负载。但对于小带宽的服务器无脑设为 false 即可。
noCompressionUserAgents:不压缩的 userAgent,没什么用
compressibleMimeType:压缩文件类型
redirectPort:当 http 请求某个资源且该资源设置必须使用 https 访问时,tomcat 自动重定向到此此端口。tomcat 默认是 8443 且 8443 对应的 Connector 是被注释的状态,正常启用 https 会改为 443 来使用。
compressibleMimeType 是 9.0 之后的新参数名,compressableMimeType 是旧参数名,注意两者区别。在一些 9.0 版本的 tomcat 使用旧参数,启动会有 warn 日志但是压缩是生效的;但也有一些版本压缩不生效。
所以建议使用新的参数名。
二、配置 TLS 证书(https)
上一步 Connector 的 redirectPort 改为 443,不改也没问题,只是后面 http 升级 https 会用到。
1、单证书配置(阿里云)
# 如果是 pfx 证书, 则 keystoreType="PKCS12"
<Connector port="443"
    protocol="HTTP/1.1"
	maxThreads="150"
    connectionTimeout="20000"

    SSLEnabled="true"
    scheme="https"
    secure="true"
	clientAuth="false"
    keystoreFile="conf/cert/domain_name.jks"
    keystoreType="JKS"
    keystorePass="证书密码"
    SSLProtocol="TLSv1.1+TLSv1.2+TLSv1.3"
    ciphers="TLS_RSA_WITH_AES_128_CBC_SHA,TLS_RSA_WITH_AES_256_CBC_SHA,TLS_ECDHE_RSA_WITH_AES_128_CBC_SHA,TLS_ECDHE_RSA_WITH_AES_128_CBC_SHA256,TLS_RSA_WITH_AES_128_CBC_SHA256,TLS_RSA_WITH_AES_256_CBC_SHA256"/>
2、多证书配置
此处验证了 jks 和 pfx 文件的方式,用其他方式请自行考量。
# 或者使用 pfx 文件, 替换文件路径即可, 其他配置一样。
<Connector port="443"
    protocol="HTTP/1.1"
	maxThreads="150"
    connectionTimeout="20000"

    SSLEnabled="true"
    scheme="https"
    secure="true"
	defaultSSLHostConfigName="test1.com">

    <SSLHostConfig hostName="test1.com">
        <Certificate certificateKeystoreFile="conf/cert/test.com.jks"
        certificateKeystorePassword="123456" type="RSA"/>
    </SSLHostConfig>

    <SSLHostConfig hostName="test2.com">
        <Certificate certificateKeystoreFile="conf/cert/test2.com.jks"
            certificateKeystorePassword="123456" type="RSA"/>
    </SSLHostConfig>
</Connector>
不能加
clientAuth="false"会报错。defaultSSLHostConfigName必填,不填启动会提示没有the hostName [_default_]。tomcat 6.x 之后默认都是 NIO,也就是 HTTP/1.1 等于 org.apache.coyote.http11.Http11NioProtocol。
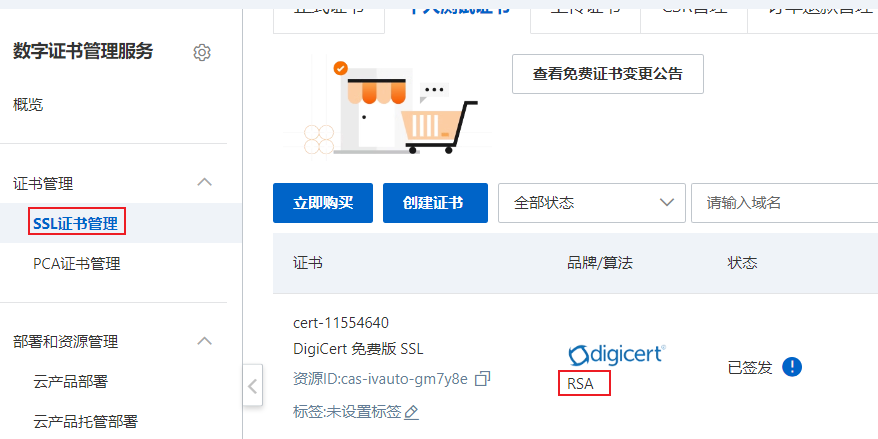
阿里云的证书都是 RSA 加密的,对应上面配置的 type,如下图。
以上两种方式,阿里云都有介绍,位置:证书管理》下载》找到 pfx》帮助。
三、设置允许跨域
1.1 项目配置 corsFilter Bean(推荐)
这只是方式之一,还有自定义 filter、重写 WebMvcConfigurer、跨域注解等方式,感兴趣请自行了解。
@Configuration
public class WebConfiguration
{
    @Bean
    public CorsFilter corsFilter()
    {
        // 1.添加 CORS 配置信息
        CorsConfiguration config = new CorsConfiguration();
		// * 表示支持所有域访问
        String[] allowedOrigins = {"https://test1.com", "https://test2.com"};
        config.setAllowedOrigins(Arrays.asList(allowedOrigins));
        // 允许跨域请求携带凭证,例如cookies。这样设置可以确保在跨域请求时,服务器可以访问到客户端的凭证信息。
        config.setAllowCredentials(true);
        config.addAllowedMethod("*");
        config.addAllowedHeader("*");
        /*
            默认返回基本响应头:
            Cache-Control
            Content-Language
            Content-Type
            Expires
            Last-Modified
            Pragma
         *
         * 其他响应头需要通过 exposedHeaders 属性添加
         */
        String[] exposedHeaders = {"Content-Disposition", "token",
                "Access-Control-Allow-Origin", "Access-Control-Allow-Credentials"};
        config.setExposedHeaders(Arrays.asList(exposedHeaders));
        // 2、添加映射路径
        UrlBasedCorsConfigurationSource corsConfigurationSource = new UrlBasedCorsConfigurationSource();
        corsConfigurationSource.registerCorsConfiguration("/**", config);
        return new CorsFilter(corsConfigurationSource);
    }

}
exposedHeaders 顾名思义 —— 可以暴露的响应头(除了基本响应头之外),token 是我们项目用到的,刷新 token 用的,不要照抄,按需配置就好。
1.2 tomcat web.xml 设置跨域
我们项目是用 war 包部署的,如果是 jar 包不用考虑这一点,参考第一点配置或者使用 nginx 配置。
项目内设置跨域 corsFilter bean,只能对接口有效,如果涉及到静态文件跨域则必须配置,比如存在场景 —— canvas 请求非当前域图片跨域 或者 前端 a 标签下载文件(常见),这种情况要么将图片移到当前域,要么 tomcat 级别设置跨域。
这里允许的域名为上面配置的多证书对应的域名。
在 apache-tomcat-9.x/conf/web.xml 的第 600 行附近左右(该部分是 tomcat 配置过滤器的位置)增加如下配置:
<filter>
		<filter-name>CorsFilter</filter-name>
		<filter-class>org.apache.catalina.filters.CorsFilter</filter-class>
		<init-param>
			<param-name>cors.allowed.origins</param-name>
			<param-value>https://test1.com,https://test2.com</param-value>
		</init-param>
		<init-param>
			<param-name>cors.allowed.methods</param-name>
			<param-value>GET,POST,HEAD,OPTIONS,PUT</param-value>
		</init-param>
		<init-param>
			<param-name>cors.allowed.headers</param-name>
			<param-value>*</param-value>
		</init-param>
		<init-param>
			<param-name>cors.exposed.headers</param-name>
			<param-value>Access-Control-Allow-Origin,Access-Control-Allow-Credentials,Content-Disposition,token</param-value>
		</init-param>
		<init-param>
			<param-name>cors.support.credentials</param-name>
			<param-value>true</param-value>
		</init-param>

	</filter>
	<filter-mapping>
		<filter-name>CorsFilter</filter-name>
		<url-pattern>/*</url-pattern>
</filter-mapping>cors.allowed.origins尽量不要用*,不安全。多个域逗号分隔。针对某个项目跨域,比如项目
/proj1,url-pattern改为/proj1/*
1.3 repsonse 设置跨域
第二点用了 apache 的 CorsFilter 拦截器,也可以自定义拦截器处理,类似于本站另一篇文章的处理方式 —— Tomcat9 设置 index.html 不缓存。
Access-Control-Expose-Headers:IDEA 提示没有这个请求头,暂时没空管。
String referer = request.getHeader("Referer");
        if (referer != null)
        {
            String[] allowedOrigins = {"https://test1.com", "https://test2.com"};
            for (String allowedOrigin : allowedOrigins) {
                if (referer.startsWith(allowedOrigin)) {
                    response.addHeader("Access-Control-Allow-Origin", allowedOrigin);
                    break;
                }
            }
            response.addHeader("Access-Control-Allow-Headers", "*");
            response.addHeader("Access-Control-Allow-Credentials", "true");
            response.addHeader("Access-Control-Expose-Headers", "*");
        }
2、验证【允许跨域】是否生效(html 由文心一言生成)
第一步,放到本地 tomcat 的 ROOT 目录下测试,随便命名,html 作为后缀即可。
第二步,新建一个简单的 springboot 项目,打 war 包,随便写一个 get 接口。可参考本站的 —— IDEA 快速搭建 SpringBoot 项目及打包
第三步,看第四点,将域名(随便定) test1.com 和 test2.com 指向 127.0.0.1。
第四步,test1.com 打开页面,调用 test2.com 接口;或者反过来,test2.com 打开页面...
<!DOCTYPE html>
<html lang="en">
<head>
    <meta charset="UTF-8">
    <title>Cross-Domain Ajax Request</title>
    <script>
        function makeCrossDomainRequest() {
            // fetch('https://test1.com/miniproj-0.0.1/api/hello', {
            fetch('https://test2.com/miniproj-0.0.1/api/hello', {
                method: 'GET',
                // mode: 'cors', // 允许跨域请求
            })
            .then(response => response.json())
            .then(data => {
                console.log(data);
                // 处理响应数据
            })
            .catch(error => {
                console.error('Error:', error);
            });
        }
    </script>
</head>
<body>
    <button onclick="makeCrossDomainRequest()">Send Cross-Domain Request</button>
</body>
</html>
四、修改 host(用于验证 https 证书 和 跨域)
网上下载软件 switchhosts ,加入域名 ip 的映射:
127.0.0.1 test1.com
127.0.0.1 test2.com
https 证书配置没问题就可以使用 https://test1.com 访问到 tomcat 了。
五、升级 http 到 https(http-A 到 https-A)
方式一:前端页面打包路径改为 https,重新打包(推荐)
方式二:tomcat 配置 http 升级到 https(有缺陷,看方式三)
vi web.xml,最底下</web-app> 标签之上加入:
<security-constraint>
         <web-resource-collection>
              <web-resource-name>SSL</web-resource-name>
              <url-pattern>/*</url-pattern>
       </web-resource-collection>
       <user-data-constraint>
                    <transport-guarantee>CONFIDENTIAL</transport-guarantee>
       </user-data-constraint>
  </security-constraint>
升级到 https,tomcat 会将请求重定向到 80 Connector 对应的 redirectPort 上。redirectPort 默认是 8443,建议改为 443。
方式三:html - header 加上 升级的 meta 标签:
<meta http-equiv="Content-Security-Policy" content="upgrade-insecure-requests">不加 meta,https 请求 http 接口,http 接口还没来得及通过服务器重定向到 https(方式二),就会被浏览器拦截,报 mixed content 的错误。
我们是 vue 单页应用,入口的 index.html 加入这一行即可。
如果是多页,一般情况下会有一个
baseUrl的配置的,修改请求的路径为 https,就不要考虑升级 https 了(方式一);或者找工具批量添加 meta 到所有 html 文件中。
六、换域名(http-A 页面过渡到 https-B 页面)
6.1 客户收藏了旧的地址,如何让 ta 更换?
前端增加 js 逻辑,判断是旧的地址
http://test1.com/index.html,window.location.replace替换成https://test2.com/index.html。如果有 nginx 是最好的,重定向到新的 https-B 的页面。
6.2 大量的 http-A 地址记录在数据库,访问跨域
a 标签下载文件 或者 canvas 读取图片 会有跨域的问题。
笨、繁琐但行之有效且没有包袱的做法:修改数据库的旧域名改为新域名。
通过 5.2 修改 meta 升级为 https-A,并且设置 https-B 页面可以跨域访问 https-A。